my BattleBot build
Step one
I was watching my favourite TV show, BattleBots, when I got the idea to build my own BattleBot with my Lego Minestorms set
Step two
To make things simple to start with, I thought I would make it three-wheeled and I would use the inside of a tyre Lego brick, so it would not have very much friction, so it could pivot around easily
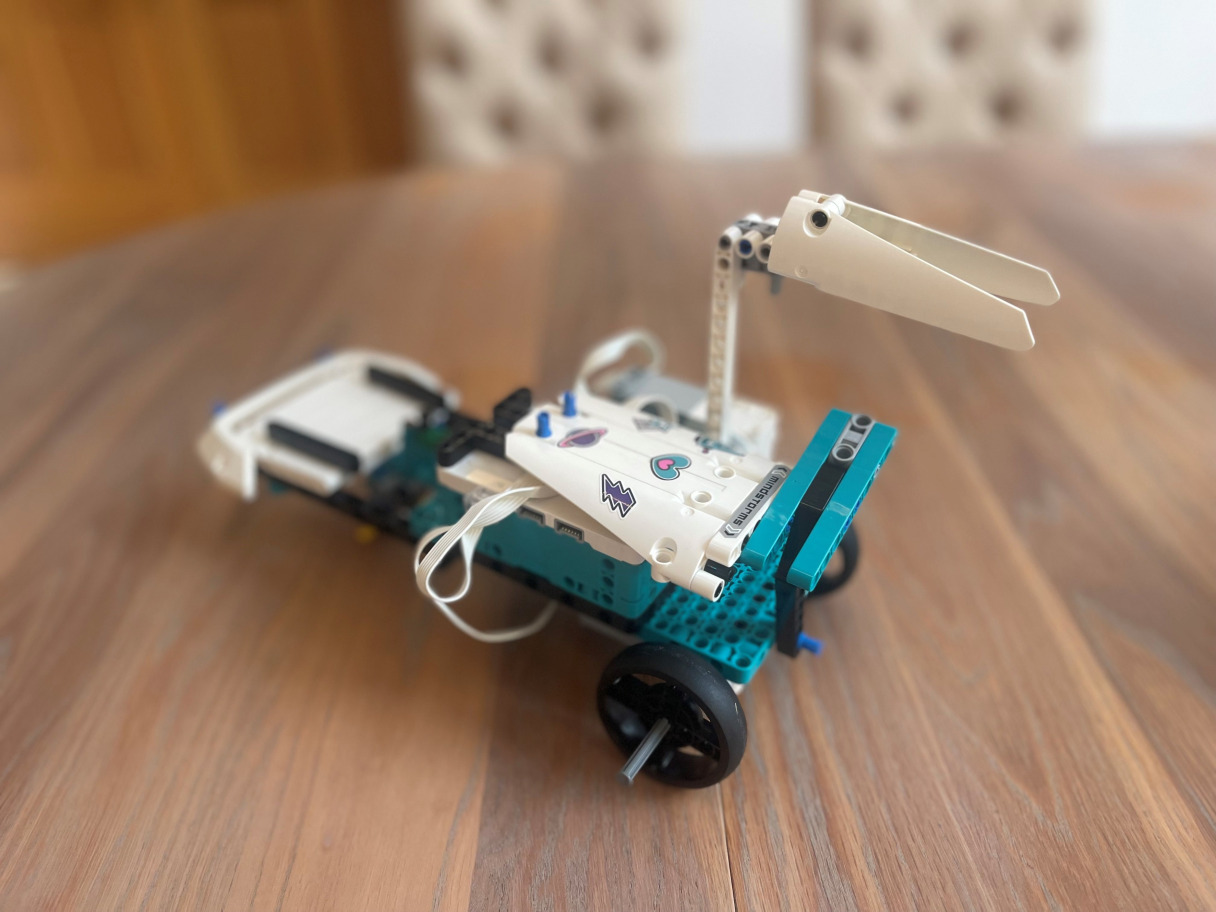
I also wanted a big hammer that could swing up and down.
Step three
First, I found a base piece to put the hub on. Then I attached the motors to the sockets on the hub. Now I can start making the hammer. I wanted the hammer to have two spiky points at the front. I quickly put this together. First, it was very floppy and wouldn’t stay upright, so I added some support underneath it. I then attached a long beam to the motor. I had to put two connectors so it would stay upright. The final part of the build was attaching the wheels, which was pretty easy. I plugged in the motors to the hub and attached two axles with two wheels on
Step four
Now it was time to program it. I hadn’t really thought about this part yet. First, I had to figure out which letter motor corresponded to which letter. I decided that I wanted to make this remote control on the app. I had never tried this before, but I had wanted to give it a go. To start, I found the block that allowed me to use the remote control. I then did basic forward and backwards movements, which worked fine. But when I tried left and right, it did not move because it kept getting stuck on the floor. This is when I realise that the friction was too high on the Tyres.
And then I replaced them for the inside which was plastic which glided along the floor quite easily now Now I had all of the movements I needed to make the hammer swing I wanted to make it so one press and release of a button would swing it forwards then backward then I realise this was quite hard as sometimes the hammer would swing too far back and then wouldn’t get down to the ground which Which meant I had to debug the code what I had done wrong was set it so it went backwards sometimes as I had accidentally not deleted my old code when I fully debugged that part it was fully working.
Here are some photos and videos of it
